Quantcast
Channel: ♛ MapleSecrets - ☯ IMBA and CRAZY RICH MapleSEA Legend ☯ ♛
Viewing all 853 articles
Browse latest View live

You probably haven't seen the WORST NERF in this universe yet.!

$
0
0
http://tw.patch.bean...0_Xenon/p1.html

Just happen to browse through TWMS website and see their Xenon update notes, and..

GUESS WHAT ?!!!

Posted Image


Quote
THEY COULD NOT CHOOSE ORCA/LOTUS TYPE XENON
Quote
CHOOSE ORCA/LOTUS TYPE XENON
Quote
ORCA/LOTUS TYPE XENON


Except the option had been changed to "Adventurer" type. (shy)(heh)

Hokay, what's your opinion on this? /heh

[Reminder] Differences in Raid Boss Event end dates & Closure of Season2 Shop

$
0
0
There is no official news regarding the closure date for Season2 Shop at the moment.

It is predicted that Season2 Shop will close around early August 2013. Even though this is unofficial news, players are strongly encouraged to redeem at least some of their wanted items to prevent unnecessary last minute unforeseen circumstances especially commitments in real life.

As for the reason behind of that no official news, probably we are too efficient. /heh

Update:
[22 July 2013, 1545HRS]
Some players also pointed out the differences in end event dates for Raid Boss Event.
In-game: 31 August 2013 (I think I saw it, any kind souls willing to post a SS here?)

View PostIxNamixl, on 22 July 2013 - 04:41 PM, said:
Here's the date from the Event Tab
Posted Image

I can't access the website though

Website: 07 August 2013 (http://maple.asiasof..._event_notes/#6)

Requires CM's attention.

MapleSEA Farm!

$
0
0
Didn't expect me to be the one who start this, but anyway, as topic, and here is mine :)

Farm name "Lumin"

edit: 20 July update
Posted Image

Posted Image

LEGENDARY HERO: PerfectLogic 11 STARS!!!

[Guide&Share]Evolving system! By prinnygame & moudikmage

$
0
0
First, this is just another redirect thread to another existing thread but with extra information from another source. Link: http://forums.playpa...dventurers-koc/

Getting To the Evolving World


Evolving System is available to those that are above Level 100 & you can access through Dimension Mirror.
Posted Image

Posted Image
The Evolving System uses a Core to generate a virtual world that changes according to the user’s preference. Basically, you can make your own maps, for both yourself and your party! (Thanks to Fiel for these images)
Posted Image
ESS
ESS is the main NPC to enter the Evolving World.
When you first click on him, he'll have two options:
Enter Evolving World
and
Questions about the Evolving World.

When you click to enter, you'll get this window

Posted Image
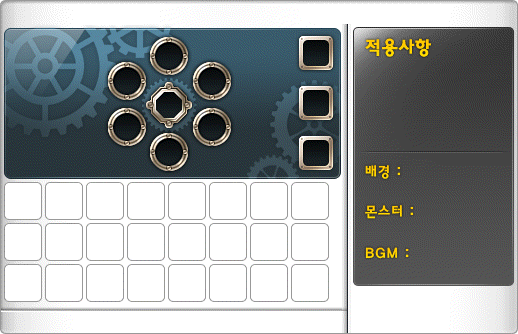
This is where you may customize your evolving world with cores. Cores are an optional (but highly recommended!) part of the evolving world. Cores can be found from monsters inside the Evolving World or by buying them from Machine-C2 (see below).
Let's break down this window for easier understanding.
Posted Image
Here is where you put in cores. On the left is monster, mission, and technical customization. However, you'll note that there are 4 locked slots. To unlock them, I will explain below.
Additionally, the middle slot, you can tell is not round like the adjacent slots. This is because it is solely for special cores.

At the right, is the environmental changes. This includes Music Change, Monster Skin Change, and Background Change.
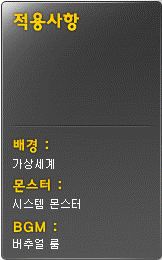
Posted Image
This section is simply just a summary of what cores you put in. The top half is for the technical changes and the bottom half is the environmental changes.
Posted Image
And of course, this is simply a inventory for the cores you gotten. Very convenient, so it wont be clogging up your inventory!
The button on the left is for organizing them.


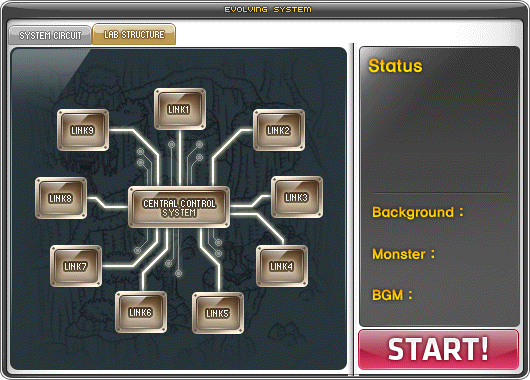
Now, clicking on the second tab will lead you to this window
KMS
Posted Image
GMS
Posted Image
This window is basically an overview of your Evolving World. It'll tell you where quests are (the '!') and if you added any mission quests it'll show that as well.

Posted Image
This NPC is a coin shop.Posted Image
To get coins, you can simply do the quests in each Link map or kill mobs.
The Machine-C2 will sell you some items, which I will update on it is release
I think you can also buy cores from here. A few will require coins, the rest require mesos. However do note that C2 will not sell all available cores.

Entering the Evolving World

Once you are ready, press START! on the Evolving World window. You'll then be inside your evolving world. Please also note that you can enter with a party.
Posted Image
Once you get in, you'll see this NPC. This is the Monster Generator. To spawn (or despawn) the monsters, you must click on this generator.

As I said before, every map in here will have a specific quest.
Posted Image
For completing the quest, you can obtain a coins, cores, and/or EXP!


Some things to note about the Evolving World:
You are only allowed inside for 30 minutes.
You can only enter 5 times a day.


Stages(links)

Links are the stages inside of your evolution world. Each stage has a quest specific to it and a monster
These quests don't HAVE to be completed, and are not recommended to be complete all the quest.
Each quest gives 1 or more evolving coins when you finish it.

Link 1: Warm-up. Talk to the ESS, then the monster generator, and kill 20 of the monsters that spawn. These monsters are very easy, and should be no problem for anybody that isn't even funded to kill.Report back to the ESS


Link 2: Report to the ESS. Collect 20 memory chip from killing monsters. These monsters are fairly easy and once again, shouldn't be a problem Return to the ESS and you will become a golem. Then go to the bottom of the map and talk to the control device. (You wont know the password so just press enter.) Then go back to the ESS


Link 3: Talk to the ESS and defeat 50 monsters. This is very easy because the monsters all gather in the center every 30 seconds or so. Then return to the ESS.
I recommend training here and hunting for equips here due to the monsters gathering in the center. The monsters gathering allows high mobbing and extreme amounts of EXP


Link 4: Talk to the ESS and defeat 20 of the pink monsters in 60 seconds. These monsters are easy, but there is always only 1 on the map at a time. They spawn in the center platform, and once you kill one, another respawns immediately. Then return to the ESS


Link 5: Talk to the ESS and defeat 4 normal monsters, and 1 transformed monster. To make the monsters transform, you must kill the monster, then kill the 4 that spawn by killing that, and then a transformed one will spawn. Be careful, because these transformed monsters can deal a lot of magic damage. Then return to the ESS


For stages 6 through 9, you must find a core by killing monsters, then when in the evolution world, you have to hunt for 50 drops and turn in the quest.Then you must restart your evolution world to get into the new link.

Link 6: Talk to the ESS, then complete the jumpquest and talk to all 4 npcs along the way. Then report back to the ESS.
No picture available... If you would like to contribute one, inform me

Link 7: Talk to the ESS and defeat 30 monsters. If a Protectron appears, kill it. This is a very easy quest, due to the spawn rate. The protectron is just a machine, and you can kill it with normal attacks or skills


Link 8: Talk to the ESS and defeat 2 Divisions. This monster will spawn by killing other monsters in the map. Be fast, because the division will disappear!


Link 9: Talk to the ESS and defeat 20 monsters.
This is the stage where empress, and all of the Cygnus instructors will spawn you have the core in.
Warning: I heard that these monsters are powerful, and can kill you in 1-3 hits if you are a class with low HP, while also having high hp themselves.


Cores list

Posted ImageMission Add - Evolving System/Accelerator
These cores will add a quest to the ESS when you enter evolution world. If you complete the quest, you will either unlock 3 more normal core slots,
Or 1 special core slot.

Posted ImageMission Add - Error Connecting to Link 6/7/8/9
These cores will add a quest the ESS when you enter evolution world. If you complete the quest and restart your evolution world, you will be able to enter the link that corresponds to the core name. You can enter this link as many times as you want.

Posted ImageMission Add - Hard Difficulty Challenge!/Aim Gap/Strains of Anti-Virus/Temporary Energy Supply/Strengthen Monsters Mode
These cores change your experience in the evolution world. Read the description of the core to know more.

Posted ImageMission Add - Shadow Monster
This core costs 600 coins, and spawns empress in link 9. She has the same health and damage, but is considered "easier" because she doesn't heal as much.
Be careful, because if you try to solo it at a low level or funding, you ARE going to die

Warning, don't equip this core unless you have link 9 unlocked, because it will expire after you use it and empress spawns in link 9


Posted ImageMonster add - Mikhail/Oz/Irena/Eckhart/Hawkeye
These cores spawn an empress minion in link 9, but you cannot have 2 different minions equiped at the same time. You also cannot have this equiped at the same
time as the cloned Pianus/Griffey/Manon cores

Posted ImageMonster Add - Cloned Pianus/Griffey/Manon
These cores spawn the boss that corresponds to the name of the core. Read the core description to see where they spawn
YES PIANUS DOES DROP THE MINIATURE PIANUS AND THE CERTIFICATE

Posted ImageMonster's Level +3/4/5/7/9/10
This does exactly what it says. It raises the monster level. This is good because higher levels = more health = more exp. Mob cap is lv 160, do not use it if the lv of the current mob is 160

Posted ImageMonster's HP x 1.2/1.5/5/10/20
This raises the monsters max health. Like previously stated, more health = more exp

Posted ImageMonster's Spawn Rate +20%/30/70/100
This raises the monster spawn rate. This is good because there will be more monsters to kill, so you get more exp and more drops

Posted ImageMonster's Skin - Classic/Fairy/Ghost/Plant/Thieves/bigSize
These cores change the way that the monsters look

Posted ImageBackground Music - Darkness/SnowDrop/DancingWithTheMoon/WindAndFlower/DragonDream/Cygnus/RisingStar/Opening
These cores change the BGM(background music) that plays while you're in the evolution world

Posted ImageBackground Skin - Ereve/Pantheon/Elluel/LionHeartCastle/ForbiddenTime
These cores change what the background of the map looks like

Posted ImageParty Play Zone +5%/10%/15% EXP
Evolution world is a party zone. This means that for every person that you bring with you, 50% more exp is gained. These cores just raise the party zone EXP rate. Please note that these cores DO NOT raise the EXP that you gain from the monsters alone.

Posted ImageDrop Rate +5%/10%/15%/20%/25%/30%
These cores raise your item drop rate while inside evo world

Posted ImageHerb Drop Rate +10%/20%/30%/40%/50%/100%
These cores raise the drop rate of your herbs. These can only be used if you have herb core equiped.

Posted ImageSpecific Herb Drop
These cores allow herbs to rop that wouldn't normally drop

Posted ImageOre Drop Rate +10%/20%/30%/40%/50%/100% and Specific Ore Drop
These work the same as the herb cores, but for ores

Posted ImageArmor Drop - Level 100/110 Armor for Warrior/Mage/Bowman/Thief/Pirate
Raises the drop rate of armor

Posted Image Rare Equipment Drop
This core makes every equip that you pick up AUTOMATICALLY POTENTIAL!

Posted Image Weapon Drop - Level 100/105/110/120
Raises the drop rate of weapons

Posted ImagePosted ImagePosted Image(Special Core) Monster's Spawn Rate +50%/ Party Play zone +5% EXP/ Drop Rate +20%
These are cores that can only be equipped after using the "Mission Add Accelerator" core. You can only have 1 equipped at a time.

A thing to note about cores:
You cannot have two of the same type of cores (So I cannot add +20% Drop Rate and +30% Drop Rate cores)
You can, however, stack same types of cores only by special cores. So for example, I have
Posted ImageParty Play Zone +10% EXP
and Posted ImageSpecial Core Party Play Zone +5% EXP
I will be able to add both cores.


Recommendations from others(at the moment)

1. Don't buy the cores that unlock new stages, you can find those as drops inside the Evol System.
2. If you get the 300 Coin Core (I forget the name, I'll check in a bit) from the shop that unlocks the final octagonal core, make sure you have Link 9 unlocked. It requires you to hunt monsters there for the drops. If try to do the quest before Link 9 is unlocked, you're going to waste 300 coins because you just can't do the quest, and it expires after you get kicked out.
3. From what others can tell, using a 1.2x HP core gives monsters about 10% more EXP per kill, 5x HP Core gives about 2x exp, and 20x HP core gives around 5.5x exp.
4. From what I have found out, the exp for mob in link 9 is 13.5time more than link 3. As when i was in link 3, lv 17x, a lv 160x mob give 4 k exp, While in link 9, the exp is 54k.


Tips and strategies
Train and hunt in link 3. This is because every about 30 seconds, all the monsters gather to the center for about a minute. This allows easy mobbing.

For training, use Monster's Level, Monster's HP and Monster's Spawn Rate(Party exp increase if you go in a party and unlock the other slot). While for hunting,

Videos


The first minutes of video is at link 3.

Empress fight


Future updates
Need more research, but i recall the nerf is lesser spawn rate and exp

Special thks to:
  • K3nT92 and his sources: Andy ( KremeChoco ) from Leafre for the full explanation of Evolving System. Max from Orangemushroomblog & Fiel from SP
  • BasilMarket Evolution World Guide creator: stevenman76


"Temporary system error, please try again next time" Bug
To solve it just make a space in your set-up slot 
 
Thread content from moudikmage:

Hi, its me the foreveralonebear again :D

I believe you guys have visited the latest training heaven a.k.a Evolving World (EW), here is my observations:

You can access to the EW by clicking the quick move button Posted Image on the left hand side of your map.
Then click the Dimensional Mirror Posted Image
and then Evolving System Posted Image

At the map "Evolving System Research Center", you will see two NPC with names ESS located at the center of the map(click to access to EW) and Machine-C2-Coin-Shop located at the right bottom of the map (click to purchase core and etc).

example of the items sold in the store
Spoiler
Posted Image


Training Preparation Summary:
1. Get yourself level 100
2. Get yourself a HS mule in your party
3. Get yourself purchase 3 cores with names "Monster HP x5 (48,000 mesos)", "Monster level altering core +7 (48,000mesos)" and "Monster population 30% (97,280mesos)"
4. Click the ESS (NPC at the centre), for instance,
Spoiler
Posted Image


The picture states that, I will create a map with x20monster HP, monster spawn +30% and monster +7level
5. Click START
6. You will reach a place called "Evolving System Link 1" Posted Image. Place your HS mule near the portal "link 3" (second from the left) shown in the following diagram.
Spoiler
Posted Image


Training in link 3 fun fact:
1. There are 19 Mobs in the map of "link 3" with 30% spawn rate. (I think default is 14mobs? need verification)
2. With 5x HP, each mobs at level 160 gives 12,642 EXP.
With Elven, you will gain extra 1,896 EXP
With 30% max pendant, you will gain extra 3,792 EXP
With HS, you will gain extra 6,321 EXP
With 2x, you will gain extra 12,642 EXP
with HS and 2x, you will gain extra 25,284 EXP
With HS and 2x and winter, you will gain extra 44,247 EXP
with HS and 3x and winter, you will gain extra 72,692 EXP

In shorts,
(i) If you go with HS + elven + max pendant, you will gain a total of 12,642*1.95 = 24,652 EXP
(ii) If you go with 2x + HS + elven + max pendant, you will gain a total of 12,642*3.45 = 43,615 EXP
(iii) If you go with 2x + winter + HS + elven + max pendant, you will gain a total of 12,642*4.95 = 62,578 EXP
(iv) If you go with 3x + winter + HS + elven + max pendant, you will gain a total of 12,642*7.2 = 91,022 EXP
with 5x HP of mobs (my default)

3. Inside the map of link 3, there is a machine-link-thingy and alot of flying monster. The monsters will be vacuumed legally to the center every 42 seconds mark when the machine "explode". Monster will respawn every 8 seconds. represent, you will most likely having a 6 waves of vac-ed monster to the center and enjoy the legitimate-hacking-training-pattern /heh. After 42seconds, the machine will "explode" again, and the monster are no longer vacuumed to the center and flying in random direction. Go chase them if you want. /heh The monsters will randomly fly for another 42 seconds before it got vac-ed to the center.
Posted Image
In shorts, HS once, go into link 3, whack the centralised-vac-ed mobs for the first time for 42s, randomly whack flying mobs for another 42s, whack the centralised-vac-ed mobs for another 42s, go to the portal at the top of the machine and return to link 1, refresh HS and come back to the map before 42s(flying period) to maximum ultilise your training period.

4. With the core "monster HP x20", each monster give 33,055 EXP. You do the math. 33,055 * 7.2 = 237,995 EXP each mobs. /heh jajajaajajajajja

5. Preferable to access to map with mobs higher level than you, I'll say 10 more than your party average level. 20% miss rate, but compensated with better exp, so, I prefer this training pattern.

Quote
level 160 mobs in link 3
with x5 HP, gives 12,642 EXP
with x10 HP, gives 19,426 EXP
with x20 HP, gives 33,055 EXP


PS: will update the exp gain if core of "monster HP x10" is used. (updated)

PS: I leveled here occasionally from 130 onwards. pretty decent I shall admit.

[Guide] [Professions] IMPS GUIDE! I NEED HELP! PLS POST YOUR REWARDS AND THE LEVEL OF THE CHAR!

$
0
0
Credits to nunchuck!
http://www.basilmark...about_Imps.html
Finally got permission from him.

iamyourmutha from basil market!
http://www.basilmark...ding_items.html


Well, now that you're starting to read my guide and wondering what imps are, I will explain them to you.

Imps are little creatures that you feed equipment and monster drops to help them grow. Once they are fully grown, they will give you a reward.

Types of Item Pots

Gemstone Imp
Posted Image
Orange Imp
Posted Image

Finding Imps

Imps are found as monster drops. They are semi-rare. They can also be found by harvesting herbs or mining.

Activating Imps

Once you pick up an imp, it is in the Use Tab. To activate the imp double click the imp.

Feeding your Imp

To feed it, open up the item pot tab (default key [Y]) and drag equipment or monster items to the imp. You can only feed your imps by feeding it equipment or monster drops around your level. The item cannot be given as food if you are a much higher level than the previously stated item. The imp has a fullness bar.

Posted Image

Once the fullness bar is full, the imp will go to sleep for 21 hours.

Posted Image

Leveling up your Imp

The only way to level up your imp is to feed it equipment. The level bar is the bar on top of the closeness bar

Posted Image

Note the fullness bar will go up even more if you feed it equipment with potential. Hint Hint

Closeness
Closeness increases every time you feed your imp. There is a delay that makes you have to wait 10 minutes for your closeness to increase. The maximum level for closeness is 100.

Max Level

This would take around 7-8 days if you did not use any special items (Look near the bottom). Once your imp reached max level, double click it and you would receive an item in your use tab. Double click that and there is your reward for your item draining creature.
Your imp would become one of these when it is max level, depending on its closeness.

Evolution Pics! (CREDITS TO CONSERVER!)


Quote
Orange Imp

Resized to 72% (was 840 x 96) - Click image to enlargePosted Image


Gemstone Imp

Resized to 72% (was 840 x 100) - Click image to enlargePosted Image


OK! Thanks to all the info the has been submitted by you guys!!!!! I shall conclude that rewards are based upon 2 main factors. basically your char level and the closeness!

The level of your char determines the tier of your reward. there are three tiers!

level 1-69: Tasty or Shiny(unconfirmed pls anyone?)
level 70-119: Fresh or Fancy
level 120-200: Sweet or brightest!

As such it is generally better to use a higher level char to raise imps sans better rewards!

Closeness!

A higher closeness will determine the rank upon the tier, for example sweet, very sweet and sweetest.

Personal experimentation has showed that 100 closeness yields the top rank reward whilst 0 closeness yields the lowest rank.

My experience has also showed that 50 closeness yields mid tier reward. however lack of info thus i am inconclusive about this.

Rewards Table

Orange Imp
Resized to 94% (was 640 x 184) - Click image to enlargePosted Image


Gemstone Imp
Resized to 94% (was 640 x 176) - Click image to enlarge
Special Items

Special items are found from harvesting herbs or mining.

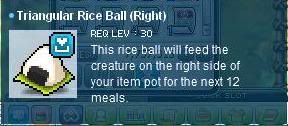
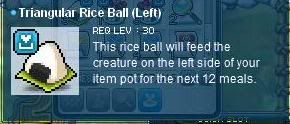
Triangular Rice Ball
Quote
Triangular Rice Ball (Right)
Posted Image
Triangular Rice Ball (Left)
Posted Image
This is placed to the right of your imp and it will feed it 12 times if your imp is hungry.
(This is good if you are going out somewhere and cannot feed it.)
Triangular Rice Ball: To be completely honest, I JUST figured out what these do yesterday. Two days ago, I ran out of pounding hearts for my imp, and I randomly found a rice ball, so I just put it in the pot until I got another pounding heart for teh lulz. And it turns out, I am SO LUCKY I decided to do that. My imp was level 5, and yesterday, I didn't sign on to Maple until 10:30 at night. That's when I realized my now level 6 imp woke up at around 6 that afternoon. I was like "NUUUUU ALL THAT LEVELING FOR NOTHINGGGGG. D:" But when I signed on, to my surprise, the previously useless triangular rice ball turned out to be an imp saver. Apparently, the triangular rice ball does not feed your imp 12 times instead of you giving it items. This rice ball saves your imp when its fullness depletes. It said something along the lines of "Your imp has been fed by triangular rice ball. Emergency food left: 11." So I guess when fullness depletes, it takes up one of the 12 meals a rice ball has. So if you have no items to place, just put one of these just in case you can't sign on for some reason by the time your imp wakes up, and it'll save it. Pretty nifty, I must say.


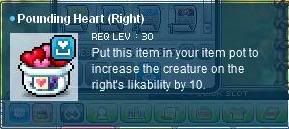
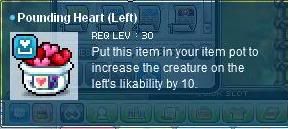
Pounding Heart
Quote
Pounding Heart (Right)
Posted Image
Pounding Heart (Left)
Posted Image
This is placed to the right of your imp and it will give it closeness when you feed it 10 times.
Pounding Hearts: THESE ARE SUPER IMPORTANT. GET THEM. This gives up to 10 closeness to your imp. You place it in the item pot next to your imp, and you feed your imp, and every time you feed it, for 10 items, your imp's closeness will increase by ten. This is how you get your imp's closeness to 100 already at an early level of 3 or 4. Just put a pounding heart, and feed it etc items until the heart goes away, so that the fullness does not max, but your closeness jumps up by 10. With enough pounding hearts, your closeness will be maxed in no time. Once again, super important item.


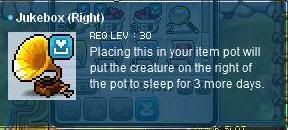
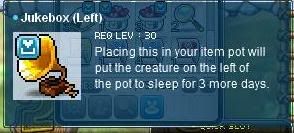
JukeBox
Quote
JukeBox (Right)
Posted Image
JukeBox (Left)
Posted Image
This is placed to the right of your imp and it will make your imp sleep for 3 more days.
(This is good if you are going out somewhere and cannot feed it.)
Note that it will only be able to work if your imp is already asleep
Jukebox: Meh. I never pick these up. I see only one use for them. These items will put your sleeping imp to sleep for 3 more days. The only use for this is if you're going on a short, weekend vacation with your family, and won't be on to feed your imp, so you need it to sleep. Other than that, you WANT your imp to wake up, so that it levels! Don't use these unless you aren't signing on for quite some time!


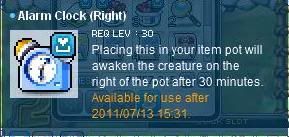
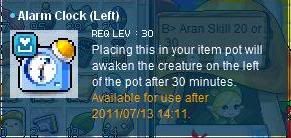
Alarm Clock
Quote
Alarm Clock (Right)
Posted Image
Alarm Clock (Left)
Posted Image
This is placed to the left of your imp and it will wake your imp up after 30 minutes.
Note that your imp would be the next level, so this is very useful.
You can only use one of these per day.
Alarm clocks: Probably the BEST, but RAREST items for your item pots. I always ask randomly if anyone has any of these. Some people will give them to you not knowing that they are freaking great for imp raising. These alarm clocks wake your imp up in half an hour, instead of nearly a full day. Waking up in half an hour= extremely fast imp growing. Some people think "Wow. Leveling in half an hour? No way! It has to sleep the full thing to level when it wakes up." Wrong. EVERY TIME YOUR IMP WAKES UP, it gains a level. No matter the circumstances. If you have a few of these, it cuts down your imp growing by a day or two. Get these. These are an amazing help and are super important.


Imp Disease Cure
Quote
Posted Image
Imp Disease Cure. O_O Yeah. Every once in a while, your imp will get sick. If you open your item pot tab, you'll see a flashing yellow jar of pills next to your sick imp. This means it's time to drop what you're doing, run to the crafting town, talk to Nack the merchant, and buy sickness pills. You have to give your imp these pills by the time its fullness bar drops from being sick. You can't postpone the fullness bar dropping by feeding it while it's sick; it will not eat while sick.


Alternative Methods to gathering food for your imp

Quote
1. I. Use the Pounding Heart (Any) and feed it equipment or monster drops until you need to use another one.
II. Keep doing this until it falls asleep.
III. Use the Alarm Clock(Any) to wake it up.
IV. Keep feeding until it falls asleep.
V. Use the another Alarm Clock (The opposite side of step III.)
VI. Feed it until it falls asleep. It has just skipped 2 levels!
Note, this will only work if your imp is in the middle pot. To make your imp in the middle, drag the imp into the middle pot.

2. I. Using accessory crafting, make useless rings. One, it would help you level your accessory crafting. Two, it would give you some items to feed your imps.
II. Buy a fatigue drink. (300,000 mesos or 1,000,000 mesos. It doesn't matter which.)
III. Mine emerald veins and heartstone veins because they give useful items.
P.S i have no idea how method 2 works, it dosen't sound plausible but i will test it out when we get our ardentmil
 
Guide to how to raise your imps

Imp placement.
Always place your imps in either the left or right pot. Never in the middle, because that's where you'll be putting support items. You might want to check your inventory and see which items you have the most of; ones that affect the left pot, or ones that affect the right. So if you mostly have items that are for your right item pot, open up your item pot tab, and click and place an imp in the right pot. However, if you're only raising one imp, then go right ahead and place it in the middle. This gives you max possibilities with the many items you find, no matter if it's for the left pot, or the right pot.

Amount of imps.
I tend to only raise one imp at a time, seeing that if you have two imps, one in the right pot, one in the left, you can't please both imps with items at the same time. Hence, being patient with my imps and only growing one at a time. This allows the imp grower to focus more on one imp, maximizing the effectiveness of raising that imp, keeping it easily fed, rather than spreading the equips and etc items between two imps, increasing the single imp's fullness much faster. However, you can raise two imps if you want. Just remember, if you're raising two imps, to not place an imp in the middle.

An item pot tab overview.
The bar next to your imp is their fullness bar. When you give an imp equips or etc drops, this bar will go up a certain amount, depending on the level of equip or etc drop. This is why etc drops were given levels in their descriptions (e.g. Lost Zombie's Tooth: [Lvl. 132] A tooth blah blah blah...) The higher the level of equip or etc drop, the more the fullness will increase. The first bar below your imp is the level, and if you hover over it, it will say something along the lines of: Level 1/8. The bar below the level bar is the closeness bar, and if you hover over that, it will say something along the lines of: Closeness 42/100. And of course, there's the actual imp itself in the middle of the display.

Fullness in-depth.
Fullness is how you level your imp. Feed the imp, fullness bar goes up. When the fullness bar reaches max, your imp will then fall asleep. However, when the fullness bar reaches zero, and you don't feed the imp enough, the imp will eventually "wither away from hunger," or something like that. The only item that affects fullness is the triangular rice ball. I'll get into that in the items section later.

Level in-depth.
The level of your imp is how you know your progress on raising the imp. There are 8 levels, and after level 8, your imp is complete! Congratulations! As I said in the section above, your imp will fall asleep when fullness is maxed. Your imp falls asleep for anywhere between 20 and 22 hours. To know how long your imp will be asleep for, just hover over your snoozing imp in the item pot tab, and it will give you a time in hours and minutes (e.g. something like "Your imp will wake up in 20 hours and 21 minutes.). When your imp wakes up, it gains a level! Just like that! However! When your imp wakes up, its fullness will begin to drop if you do not feed it, which means you need to keep track of when your imp wakes up, so that it doesn't die. Items that affect level due to affecting sleep are the alarm clock and the jukebox. I'll get into that in the items section later.

Closeness in-depth.
The closeness of your imp is the second priority in raising the imp, after the fullness. You want to make sure your imp has 100/100 closeness when it is finished leveling, giving you a better item afterwards. Getting closeness to 100/100 by level 3 or 4 is extremely easy, which will be explained in a later section. When your imp is fed something, its closeness will increase by 1. However, just regularly feeding it only increases its closeness by 1 once every ten minutes. That's a long time. I'll get into that later. The only item that affects closeness is the pounding heart. I'll get into that in the items section later. Posted Image

Not Enough MapleSEA GMs?

$
0
0
The GMs are NOT powerless.
The problem lies with *oops*Soft.
They will not hire enough GMs to handle both testing of future content and enforcing TOS on servers.
They are also paying "peanuts". And when you pay "peanuts" you only get monkeys working for the company.
And monkeys are well known for slacking all day and not getting any work done.
A fine example is all the great "EVENTS" we have had. 
To name a few....
HACK DETECTED EVENT
INVALID POINTER EVENT
EXTENDED SERVER MAINTENANCE EVENT
EXTENTED NETWORK MAINENANCE EVENT
EMERGENCY NETWORK MAINTENANCE EVENT (a day after networking maintenance)
EXTENDED SERVER PATCH EVENT
EXTENDED CASH SHOP UPDATE EVENT

Really makes you wonder what all the "monkeys" are doing in *oops*soft office. 

EMS V93 Spark patch

$
0
0
Posted Image


Their patch note

In summary,
UI changes (Sparky version)
Scrolling/ enhancement revamp (Sparky version) 
Future Perion
Monster park: Spirit valley 

Correct meh if I am wrong, MSEA and KMS are the only few versions that have not been sparked (UI changes). 

So... 
Prediction time, will MSEA be Spark'd or RED'd? Or even.. *lol exclusive patch* 

EMS - V92.1 Update - Xenon

MapleSEA 9,999,999,999 meso cap

$
0
0
Posted Image
Unleashed! Well, sounds much better than Unlimited, right? :D

Click here for the teaser site!


CONTENTS:
June 19 - 
Quote
LEVEL 250

Level 250 is finally here! But what does 250 really mean? It means MORE of the things you love about MapleStory! More mesos, more skills, more power... Prepare for a new era of adventure, complete with stage 3 link skills, high-level content, a shiny new UI, and much MORE!

NEW HIGH-LEVEL CONTENT

You're going to need much tougher opponents to showcase all that newfound power, and entire new areas of Maple World have opened up just to satisfy your level 250 lifestyle. Journey to Twilight Perion, a new Monster Park zone, 2 new theme dungeons, and the revamped Malaysia and Singapore regions to flex your leveling muscles and punch some level 250-sized holes in anything that takes notice.

REVAMPED INTERFACE

Global MapleStory is getting a majorly revamped user interface! View inventory, equipment, and character stats in one window, auto sort your scrolls, add multiple points to your stats at once, and experience Maple World like never before with sweeping enhancements to the character, equipment, skill, world map, and item enhancement UI!


Click here for the Update Highlights!

Click here for the Update Notes!

Resized to 94% (was 640 x 470) - Click image to enlargePosted Image

Singapore map. It looks nice :D

Resized to 94% (was 640 x 470) - Click image to enlargePosted Image

Ghost Ship map.

Resized to 94% (was 640 x 470) - Click image to enlargePosted Image

Malaysia map.

Update Spotlight:


July 3 - What? Same day as our Xenon /heh
Quote
XENON

Brought into Maple World by Gelimer, lead scientist of the Black Wings, Xenon is still unsure of what his future holds. In fact, he's not quite sure about his past either. Someone erased his memory, and it's up to him to find out why and reclaim the life he doesn't even know he had! It won't be easy, but Xenon is no pushover. With his powerful fusion of the Pirate and Thief classes and his own weapon, the Beam Whip, this high-tech cyborg is equipped to bring justice to those who seek to control him.


Click here for the Update Highlights!

Click here for the Update Notes!

Xenon Trailer:


July 24 -
Quote
DEMON AVENGER

Fate can change people in an instant, and now you can too! When you create a Demon character, you'll now have the power to choose between Demon Slayer and the new Demon Avenger class. Would you do anything in your power to thwart the Black Mage, even if it meant sacrificing your own health? The Demon Avenger fights with a new HP-based skill system, channeling his own vitality into every strike! Coupled with Exceed skills, which gain speed, range, and power as the Demon Avenger continuously attacks, this new system allows for escalating damage that will have followers of the Black Mage running for their lives!


Click here for the Update Highlights!

PREVIEWS:
Resized to 64% (was 949 x 236) - Click image to enlargePosted Image

Interesting, right?

Resized to 65% (was 924 x 531) - Click image to enlargePosted Image

Movable chatbox?? Seriously?

Resized to 63% (was 960 x 720) - Click image to enlargePosted Image

Looks almost exactly the same as CMST

Resized to 63% (was 960 x 721) - Click image to enlargePosted Image

1024x768 resolution. That looks exactly the same type of ugliness lol.

Resized to 75% (was 806 x 606) - Click image to enlargePosted Image

800x600 resolution. The HP/MP bar looks even smaller and uglier.

Resized to 63% (was 960 x 571) - Click image to enlargePosted Image

Equipment Inventory Stats for various jobs, I think.

Resized to 75% (was 806 x 540) - Click image to enlargePosted Image

Resized to 80% (was 753 x 324) - Click image to enlargePosted Image

Resized to 81% (was 747 x 324) - Click image to enlargePosted Image

Resized to 81% (was 747 x 324) - Click image to enlargePosted Image

Equip Enhancement Window. I find this quite OK actually :)

Posted Image
Self-explanatory. We have this already.

Posted Image
What is this? You might ask. Let me quote this from ribbonpig.
Quote
A Hero hitting over 1,000,000 damage with a Level 70 weapon.

So these pictures confirm a few more things:

We’re getting the 9,999,999,999 meso cap.
Good chance we aren’t getting the damage cap from cMS. It seems we’re getting the one from kMS.
You can combine scrolls


Credits:
RibbonPig's Blog
FanJingEvan for the screenshots and the links to Unleashed
Reppps for the GMS' version picture
Official GMS website
Ventec for posting the videos 

[KMST] 1.2.484 (Gotta Catch 'em All)

$
0
0
Game-Related
1. New Area 'Critias' added
-Critias is a kingdom that disappeared long ago from the Maple World
-Critias is aimed for Lv. 180 and above
-You can get to Critias by Leafre: Sky Nest 1, Pantheon Dimension Gate, Veritas, and Crystal Garden
-World Map will be added later

2. Critias has the following features
-Monsters drop Magic Stone pieces
-Magic stones can be used for a coin shop in Critias or for Inverse Codex, making your Codex stronger
-Critias Black Mage Brigade Generals constantly invade the area. This takes place several times daily. Help the people of Critias to combat against them!
-If the brigade generals happen to do damage, help repair and return Critias to it's original state
-The Brigade Generals are powerful as long as the Captain. Defeat the captain for special rewards
-For the test server, the invasion does not happen.

3. Monster Battle <Bamon's League> (AKA Pokemon League) has been added
I. Overview
-Bamon's League consist of various monsters that inhabit the maple world in which you can capture and battle with other players

II. Capture
-After completing a quest, you'll receive the capturing skills necessary to capture monsters.
-The success probability of capturing depends on the monster's level and skill level
-A monster captured can be shared in the account

III. Battle
-If you have more than 3 monsters captured, you can participate in Baemon's League
-the Baemon UI can be opened through a shortcut or the Menu. the UI is a book displaying your equipped monster, Baemon skills, equipment, and more!
-At the bottom of the UI there is a 'Battle!' button in which you can search for opponents
-The system will search throughout the world for an opponent with similar level as to yours. At the start of the battle, you can choose to attack your opponent. If you do not select, the system will automatically, randomly, select for you.
-Automatically, when the battle ends, the battle results and changes in ranking scores will be displayed along side with the EXP gained. During the battle, the UI can be minimized

IV. Result
-The outcome depends on the outcome of the battle and level
-Ranking scores are as follows: Beginner, Amateur, Semi-Pro, Pro, Star, Super-Star, Legend, Mythic
-Constantly battling can give your monsters additional effects to help them grow 

"While Stock Last" SCAM!

$
0
0
Only Limited Stocks Avaliable! Get yours before they are all gone!

Example : http://maple.asiasof...y_online_sales/

Seriously,did it happen? Out of stock in iGacha sales or whatever similar sales that can buy it online.
It's reasonable that real life bus party or road show out of stock as in they giving out in hardcopy,online sales they only need to regenerate new codes am I right? (correct me if i'm wrong)

I can see that some of my buddies worrying about the problem of "out of stock",some of them got nothing to do with @cash unless buying pet for new chars.

Random Beauty Coupon Event

$
0
0
If you ask me, i would say, " YES YES YESSHHHHHHHHH !!!" Of course, who wouldn't want this event to come back? Seeing GMS already get theirs on their Demon Avenger Patch today, why shouldn't we to get them too as our Cygnus' Returns Patch will be happened on school holidays? (heh)(shy)

There are several reasons personally why i want this event to come back:

1. I'm growing weary of Tear's ugly mushroom head hair although 99% of the time I'm staying in AB mode.

2. I don't like my Lumi's dual-colored eyes for some reason.

3. I'm looking forward to change my new striker (or my readily available wind breaker)'s face as I know i will hate his ugly hairstyle and sleepy eyes. /heh

Supposed Miracle Cube Probability

$
0
0
Disclaimer
Before you flame me, please don't hold the probabilities in this thread as completely true. The only source that I've gotten this information is from two miracle cube simulators and a few insoya threads. The values were all the same, some of the threads were deleted and so on. The purpose of this thread is similar to those in the Module, except that this one has the supposed probabilities that Koreans advertise.

Potential
Hat

Rare Secondary

StatFormula in relation to XProbability
STR + X(level/20)7.4%
DEX + X(level/20)7.4%
INT + X(level/20)7.4%
LUK + X(level/20)7.4%
MaxHP + X(level/2)7.4%
MaxMP + X(level/2)7.4%
Accuracy + X(level/5)7.4%
Avoidability +X(level/5)7.4%
Weapon DEF +X(level/2)11.1%
Magic DEF +X(level/2)11.1%
10% Chance to go into rage for 10 seconds"F5"3.7%
10% Chance to get furious for 10 seconds"Flaming"3.7%
10% Chance to feel Happy for 10 Seconds"F2"3.7%
10% Chance to fall in love for 10 seconds"Goo Goo"3.7%
10% Chance to be deeply moved for 10 seconds"Sparkly Eyes"3.7%


Rare Primary, Epic Secondary

StatFormula in relation to XProbability
STR + X(floor((level + 10)/20)*2)7.7%
DEX + X(floor((level + 10)/20)*2)7.7%
INT + X(floor((level + 10)/20)*2)7.7%
LUK + X(floor((level + 10)/20)*2)7.7%
MaxHP + X(level)7.7%
MaxMP + X(level)7.7%
Accuracy+ X(level/2.5)7.7%
Avoidability +X(level/2.5)7.7%
STR + X%(job adv range)1.2%
DEX + X%(job adv range)1.2%
INT + X%(job adv range)1.2%
LUK + X%(job adv range)1.2%
Accuracy + X%(job adv range)1.2%
Avoidability + X%(job adv range)1.2%
All Stat + X((level + 10)/20)1.9%
Weapon DEF + X(level)11.6%
Magic DEF +X(level)11.6%
MaxHP +X%(job adv range)1.2%
MaxMP +X%(job adv range)1.2%
Weapon DEF + X%(job adv range)1.9%
Magic DEF + X%(job adv range)1.9%


Epic Primary, Unique Secondary

StatFormula in relation to XProbability
sTR + X%(job adv range*2)6.3%
DEX + X%(job adv range*2)6.3%
INT + X%(job adv range*2)6.3%
LUK + X%(job adv range*2)6.3%
Accuracy + X%(job adv range*2)6.3%
Avoidability + X%(job adv range*2)6.3%
All Stat + X%(job adv range)4.2%
MaxHP + X%(job adv range*2)6.3%
MaxMP + X%(job adv range*2)6.3%
Weapon DEF + X%(job adv range*2)10.4%
Magic DEF + X%(job adv range*2)10.4%
Ignore Damage (20% chance, level/5 + 1)8.2%
Ignore Damage (20% chance, level*3/10 + 2)8.2%
Ignore Damage (30% chance, level*2/5 + 3)8.2%


Unique Primary, Legendary Secondary

StatFormula in relation to XProbability
STR + X%(job adv range*3)5%
DEX + X%(job adv range*3)5%
INT + X%(job adv range*3)5%
LUK + X%(job adv range*3)5%
Accuracy + X%(job adv range*3)5%
Avoidability + X%(job adv range*3)5%
All Stat + X%(job adv range*2)3.3%
MaxHP + X%(job adv range*3)5%
MaxMP + X%(job adv range*3)5%
Weapon DEF + X%(job adv range*3)8.3%
Magic DEF + X%(job adv range*3)8.3%
HP Recovery Items and Skills + X%(job adv range*10)8.3%
Ignore Damage %(5% chance, 20% damage)[Level 20+]8.3%
Ignore Damage %(5% chance, 40% damage)[Level 40+]8.3%
All Skills + 1 Levels[Level 30+]3.3%
All Skills + 2 Levels[Level 70+]3.3%
Able to use the <Decent Mystic Door> Skill[Level 70+]8.3%


Legendary Primary

StatFormula in relation to XProbability
STR + X%(job adv range*4)4.5%
DEX + X%(job adv range*4)4.5%
INT + X%(job adv range*4)4.5%
LUK + X%(job adv range*4)4.5%
Accuracy + X%(job adv range*4)4.5%
Avoidability + X%(job adv range*4)4.5%
All Stat + X%(job adv range*3)3%
MaxHP + X%(job adv range*4)4.5%
MaxMP + X%(job adv range*4)4.5%
Weapon DEF + X%(job adv range*4)7.5%
Magic DEF + X%(job adv range*4)7.5%
HP Recovery Items and Skills + X%((job adv range+1)*10)7.5%
Ignore Damage %(10% chance, 20% damage)[Level 20+]7.5%
Ignore Damage %(10% chance, 40% damage)[Level 40+]7.5%
All Skills + 2 Levels[Level 30+]3%
All Skills + 3 Levels[Level 70+]3%
Cooldown - 1 seconds[Level 70+]4.5%
Cooldown - 2 sec[Level 120+]4.5%
Able to use the <Decent Advanced Blessing> Skill[Level 120+]7.5%


Tops and Overalls

Rare Secondary

StatFormula in relation to XProbability
STR + X(level/20)9.1%
DEX + X(level/20)9.1%
INT + X(level/20)9.1%
LUK + X(level/20)9.1%
MaxHP + X(level/2)9.1%
MaxMP + X(level/2)9.1%
Accuracy + X(level/5)9.1%
Avoidability +X(level/5)9.1%
Weapon DEF +X(level/2)13.6%
Magic DEF +X(level/2)13.6%


Rare Primary, Epic Secondary

StatFormula in relation to XProbability
STR + X(floor((level + 10)/20)*2)7.7%
DEX + X(floor((level + 10)/20)*2)7.7%
INT + X(floor((level + 10)/20)*2)7.7%
LUK + X(floor((level + 10)/20)*2)7.7%
MaxHP + X(level)7.7%
MaxMP + X(level)7.7%
Accuracy+ X(level/2.5)7.7%
Avoidability +X(level/2.5)7.7%
STR + X%(job adv range)1.2%
DEX + X%(job adv range)1.2%
INT + X%(job adv range)1.2%
LUK + X%(job adv range)1.2%
Accuracy + X%(job adv range)1.2%
Avoidability + X%(job adv range)1.2%
All Stat + X((level + 10)/20)1.9%
Weapon DEF + X(level)11.6%
Magic DEF +X(level)11.6%
MaxHP +X%(job adv range)1.2%
MaxMP +X%(job adv range)1.2%
Weapon DEF + X%(job adv range)1.9%
Magic DEF + X%(job adv range)1.9%


Epic Primary, Unique Secondary

StatFormula in relation to XProbability
sTR + X%(job adv range*2)4.9%
DEX + X%(job adv range*2)4.9%
INT + X%(job adv range*2)4.9%
LUK + X%(job adv range*2)4.9%
Accuracy + X%(job adv range*2)4.9%
Avoidability + X%(job adv range*2)4.9%
All Stat + X%(job adv range)3.3%
MaxHP + X%(job adv range*2)4.9%
MaxMP + X%(job adv range*2)4.9%
Weapon DEF + X%(job adv range*2)8.2%
Magic DEF + X%(job adv range*2)8.2%
Ignore Damage (20% chance, level/5 + 1)8.2%
Ignore Damage (20% chance, level*3/10 + 2)8.2%
Ignore Damage (30% chance, level*2/5 + 3)8.2%
Invincibility duration after attacked + X 1 second8.2%
Status effect duration - 2 seconds[Level 50+]8.2%


Unique Primary, Legendary Secondary

StatFormula in relation to XProbability
STR + X%(job adv range*3)4.9%
DEX + X%(job adv range*3)4.9%
INT + X%(job adv range*3)4.9%
LUK + X%(job adv range*3)4.9%
Accuracy + X%(job adv range*3)4.9%
Avoidability + X%(job adv range*3)4.9%
All Stat + X%(job adv range*2)3.3%
MaxHP + X%(job adv range*3)4.9%
MaxMP + X%(job adv range*3)4.9%
Weapon DEF + X%(job adv range*3)8.2%
Magic DEF + X%(job adv range*3)8.2%
HP Recovery Items and Skills + X%(job adv range*10)8.2%
Ignore Damage %(5% chance, 20% damage)[Level 20+]8.2%
Ignore Damage %(5% chance, 40% damage)[Level 40+]8.2%
Invincibility duration after attacked + X2 seconds8.2%
Increase invincibility time(2% chance, floor((level + 30)/40 + 4) seconds)8.2%


Legendary Primary

StatFormula in relation to XProbability
STR + X%(job adv range*4)4.7%
DEX + X%(job adv range*4)4.7%
INT + X%(job adv range*4)4.7%
LUK + X%(job adv range*4)4.7%
Accuracy + X%(job adv range*4)4.7%
Avoidability + X%(job adv range*4)4.7%
All Stat + X%(job adv range*3)3.1%
MaxHP + X%(job adv range*4)4.7%
MaxMP + X%(job adv range*4)4.7%
Weapon DEF + X%(job adv range*4)7.8%
Magic DEF + X%(job adv range*4)7.8%
HP Recovery Items and Skills + X%((job adv range+1)*10)7.8%
Ignore Damage %(10% chance, 20% damage)[Level 20+]7.8%
Ignore Damage %(10% chance, 40% damage)[Level 40+]7.8%
Invincibility duration after attacked + X3 seconds4.7%
Increase invincibility time(4% chance, floor((level + 30)/40 + 4) seconds)8.2%
Elemental Resistance: +10%[Level 70+]7.8%


Bottoms

Rare Secondary

StatFormula in relation to XProbability
STR + X(level/20)9.1%
DEX + X(level/20)9.1%
INT + X(level/20)9.1%
LUK + X(level/20)9.1%
MaxHP + X(level/2)9.1%
MaxMP + X(level/2)9.1%
Accuracy + X(level/5)9.1%
Avoidability +X(level/5)9.1%
Weapon DEF +X(level/2)13.6%
Magic DEF +X(level/2)13.6%


Rare Primary, Epic Secondary

StatFormula in relation to XProbability
STR + X(floor((level + 10)/20)*2)7.7%
DEX + X(floor((level + 10)/20)*2)7.7%
INT + X(floor((level + 10)/20)*2)7.7%
LUK + X(floor((level + 10)/20)*2)7.7%
MaxHP + X(level)7.7%
MaxMP + X(level)7.7%
Accuracy+ X(level/2.5)7.7%
Avoidability +X(level/2.5)7.7%
STR + X%(job adv range)1.2%
DEX + X%(job adv range)1.2%
INT + X%(job adv range)1.2%
LUK + X%(job adv range)1.2%
Accuracy + X%(job adv range)1.2%
Avoidability + X%(job adv range)1.2%
All Stat + X((level + 10)/20)1.9%
Weapon DEF + X(level)11.6%
Magic DEF +X(level)11.6%
MaxHP +X%(job adv range)1.2%
MaxMP +X%(job adv range)1.2%
Weapon DEF + X%(job adv range)1.9%
Magic DEF + X%(job adv range)1.9%


Epic Primary, Unique Secondary

StatFormula in relation to XProbability
sTR + X%(job adv range*2)5.9%
DEX + X%(job adv range*2)5.9%
INT + X%(job adv range*2)5.9%
LUK + X%(job adv range*2)5.9%
Accuracy + X%(job adv range*2)5.9%
Avoidability + X%(job adv range*2)5.9%
All Stat + X%(job adv range)3.9%
MaxHP + X%(job adv range*2)5.9%
MaxMP + X%(job adv range*2)5.9%
Weapon DEF + X%(job adv range*2)9.8%
Magic DEF + X%(job adv range*2)9.8%
Ignore Damage (20% chance, level/5 + 1)9.8%
Ignore Damage (20% chance, level*3/10 + 2)9.8%
Ignore Damage (30% chance, level*2/5 + 3)9.8%


Unique Primary, Legendary Secondary

StatFormula in relation to XProbability
STR + X%(job adv range*3)5.4%
DEX + X%(job adv range*3)5.4%
INT + X%(job adv range*3)5.4%
LUK + X%(job adv range*3)5.4%
Accuracy + X%(job adv range*3)5.4%
Avoidability + X%(job adv range*3)5.4%
All Stat + X%(job adv range*2)3.8%
MaxHP + X%(job adv range*3)5.4%
MaxMP + X%(job adv range*3)5.4%
Weapon DEF + X%(job adv range*3)8.9%
Magic DEF + X%(job adv range*3)8.9%
HP Recovery Items and Skills + X%(job adv range*10)8.9%
Ignore Damage %(5% chance, 20% damage)[Level 20+]8.9%
Ignore Damage %(5% chance, 40% damage)[Level 40+]8.9%
Able to use the <Decent Hyper Body> skill[Level 70+]8.9%


Legendary Primary

StatFormula in relation to XProbability
STR + X%(job adv range*4)4.7%
DEX + X%(job adv range*4)4.7%
INT + X%(job adv range*4)4.7%
LUK + X%(job adv range*4)4.7%
Accuracy + X%(job adv range*4)4.7%
Avoidability + X%(job adv range*4)4.7%
All Stat + X%(job adv range*3)3.1%
MaxHP + X%(job adv range*4)4.7%
MaxMP + X%(job adv range*4)4.7%
Weapon DEF + X%(job adv range*4)7.8%
Magic DEF + X%(job adv range*4)7.8%
HP Recovery Items and Skills + X%((job adv range+1)*10)7.8%
Ignore Damage %(10% chance, 20% damage)[Level 20+]7.8%
Ignore Damage %(10% chance, 40% damage)[Level 40+]7.8%
Reflect X% of enemy's damage at Y% chanceX=5+(job adv range*15), Y = 10/20/30%7.8%
Reflect X% of enemy's damage at Y% chanceX=10+(job adv range*20), Y = 10/20/30%7.8%
Status Resistance: +10%[Level 70+]4.7%


Gloves

Rare Secondary

StatFormula in relation to XProbability
STR + X(level/20)9.1%
DEX + X(level/20)9.1%
INT + X(level/20)9.1%
LUK + X(level/20)9.1%
MaxHP + X(level/2)9.1%
MaxMP + X(level/2)9.1%
Accuracy + X(level/5)9.1%
Avoidability +X(level/5)9.1%
Weapon DEF +X(level/2)13.6%
Magic DEF +X(level/2)13.6%


Rare Primary, Epic Secondary

StatFormula in relation to XProbability
STR + X(floor((level + 10)/20)*2)7.7%
DEX + X(floor((level + 10)/20)*2)7.7%
INT + X(floor((level + 10)/20)*2)7.7%
LUK + X(floor((level + 10)/20)*2)7.7%
MaxHP + X(level)7.7%
MaxMP + X(level)7.7%
Accuracy+ X(level/2.5)7.7%
Avoidability +X(level/2.5)7.7%
STR + X%(job adv range)1.2%
DEX + X%(job adv range)1.2%
INT + X%(job adv range)1.2%
LUK + X%(job adv range)1.2%
Accuracy + X%(job adv range)1.2%
Avoidability + X%(job adv range)1.2%
All Stat + X((level + 10)/20)1.9%
Weapon DEF + X(level)11.6%
Magic DEF +X(level)11.6%
MaxHP +X%(job adv range)1.2%
MaxMP +X%(job adv range)1.2%
Weapon DEF + X%(job adv range)1.9%
Magic DEF + X%(job adv range)1.9%


Epic Primary, Unique Secondary

StatFormula in relation to XProbability
sTR + X%(job adv range*2)4.2%
DEX + X%(job adv range*2)4.2%
INT + X%(job adv range*2)4.2%
LUK + X%(job adv range*2)4.2%
Accuracy + X%(job adv range*2)4.2%
Avoidability + X%(job adv range*2)4.2%
All Stat + X%(job adv range)2.8%
MaxHP + X%(job adv range*2)4.2%
MaxMP + X%(job adv range*2)4.2%
Weapon DEF + X%(job adv range*2)7%
Magic DEF + X%(job adv range*2)7%
Ignore Damage (20% chance, level/5 + 1)7%
Ignore Damage (20% chance, level*3/10 + 2)7%
Ignore Damage (30% chance, level*2/5 + 3)7%
Gain X HP after attacking with 15% chance(level/2 + 35 HP)14%
Gain X MP after attacking with 15% chance(level/2 + 35 MP)14%


Unique Primary, Legendary Secondary

StatFormula in relation to XProbability
STR + X%(job adv range*3)4.5%
DEX + X%(job adv range*3)4.5%
INT + X%(job adv range*3)4.5%
LUK + X%(job adv range*3)4.5%
Accuracy + X%(job adv range*3)4.5%
Avoidability + X%(job adv range*3)4.5%
All Stat + X%(job adv range*2)3%
MaxHP + X%(job adv range*3)4.5%
MaxMP + X%(job adv range*3)4.5%
Weapon DEF + X%(job adv range*3)7.6%
Magic DEF + X%(job adv range*3)7.6%
HP Recovery Items and Skills + X%(job adv range*10)7.6%
Ignore Damage %(5% chance, 20% damage)[Level 20+]7.6%
Ignore Damage %(5% chance, 40% damage)[Level 40+]7.6%
1% chance to Auto-Steal[Level 20+]7.6%
2% chance to Auto-Steal[Level 40+]7.6%
Able to use the <Decent Sharp Eyes> skill[Level 120+]7.6%


Legendary Primary

StatFormula in relation to XProbability
STR + X%(job adv range*4)3.9%
DEX + X%(job adv range*4)3.9%
INT + X%(job adv range*4)3.9%
LUK + X%(job adv range*4)3.9%
Accuracy + X%(job adv range*4)3.9%
Avoidability + X%(job adv range*4)3.9%
All Stat + X%(job adv range*3)2.6%
MaxHP + X%(job adv range*4)3.9%
MaxMP + X%(job adv range*4)3.9%
Weapon DEF + X%(job adv range*4)6.5%
Magic DEF + X%(job adv range*4)6.5%
HP Recovery Items and Skills + X%((job adv range+1)*10)6.5%
Ignore Damage %(10% chance, 20% damage)[Level 20+]6.5%
Ignore Damage %(10% chance, 40% damage)[Level 40+]6.5%
3% chance to Auto-Steal[Level 20+]6.5%
5% chance to Auto-Steal[Level 40+]6.5%
7% chance to Auto-Steal[Level 60+]6.5%
Critical Max Damage: +X%(level/10)+(job adv range*2)[Level 50+]3.9%
Critical Min Damage: +X%(level/10)+(job adv range*2)[Level 50+]3.9%
Able to use the <Decent Speed Infusion> Skill[Level 120+]6.5%


Shoes


Rare Secondary

StatFormula in relation to XProbability
STR + X(level/20)7.7%
DEX + X(level/20)7.7%
INT + X(level/20)7.7%
LUK + X(level/20)7.7%
MaxHP + X(level/2)7.7%
MaxMP + X(level/2)7.7%
Accuracy + X(level/5)7.7%
Avoidability +X(level/5)7.7%
Weapon DEF +X(level/2)11.5%
Magic DEF +X(level/2)11.5%
Speed +X(job adv range)7.7%
Jump +X(job adv range)7.7%


Rare Primary, Epic Secondary

StatFormula in relation to XProbability
STR + X(floor((level + 10)/20)*2)6.7%
DEX + X(floor((level + 10)/20)*2)6.7%
INT + X(floor((level + 10)/20)*2)6.7%
LUK + X(floor((level + 10)/20)*2)6.7%
MaxHP + X(level)6.7%
MaxMP + X(level)6.7%
Accuracy+ X(level/2.5)6.7%
Avoidability +X(level/2.5)6.7%
Speed +X(job adv range*2)6.7%
Jump + X(job adv range*26.7%
STR + X%(job adv range)1%
DEX + X%(job adv range)1%
INT + X%(job adv range)1%
LUK + X%(job adv range)1%
Accuracy + X%(job adv range)1%
Avoidability + X%(job adv range)1%
All Stat + X((level + 10)/20)1.7%
Weapon DEF + X(level)10%
Magic DEF +X(level)10%
MaxHP +X%(job adv range)1%
MaxMP +X%(job adv range)1%
Weapon DEF + X%(job adv range)1.7%
Magic DEF + X%(job adv range)1.7%


Epic Primary, Unique Secondary

StatFormula in relation to XProbability
sTR + X%(job adv range*2)5.9%
DEX + X%(job adv range*2)5.9%
INT + X%(job adv range*2)5.9%
LUK + X%(job adv range*2)5.9%
Accuracy + X%(job adv range*2)5.9%
Avoidability + X%(job adv range*2)5.9%
All Stat + X%(job adv range)3.9%
MaxHP + X%(job adv range*2)5.9%
MaxMP + X%(job adv range*2)5.9%
Weapon DEF + X%(job adv range*2)9.8%
Magic DEF + X%(job adv range*2)9.8%
Ignore Damage (20% chance, level/5 + 1)9.8%
Ignore Damage (20% chance, level*3/10 + 2)9.8%
Ignore Damage (30% chance, level*2/5 + 3)9.8%


Unique Primary, Legendary Secondary

StatFormula in relation to XProbability
STR + X%(job adv range*3)5.4%
DEX + X%(job adv range*3)5.4%
INT + X%(job adv range*3)5.4%
LUK + X%(job adv range*3)5.4%
Accuracy + X%(job adv range*3)5.4%
Avoidability + X%(job adv range*3)5.4%
All Stat + X%(job adv range*2)3.8%
MaxHP + X%(job adv range*3)5.4%
MaxMP + X%(job adv range*3)5.4%
Weapon DEF + X%(job adv range*3)8.9%
Magic DEF + X%(job adv range*3)8.9%
HP Recovery Items and Skills + X%(job adv range*10)8.9%
Ignore Damage %(5% chance, 20% damage)[Level 20+]8.9%
Ignore Damage %(5% chance, 40% damage)[Level 40+]8.9%
Able to use the <Decent Haste> skill[Level 70+]8.9%


Legendary Primary

StatFormula in relation to XProbability
STR + X%(job adv range*4)5.3%
DEX + X%(job adv range*4)5.3%
INT + X%(job adv range*4)5.3%
LUK + X%(job adv range*4)5.3%
Accuracy + X%(job adv range*4)5.3%
Avoidability + X%(job adv range*4)5.3%
All Stat + X%(job adv range*3)3.6%
MaxHP + X%(job adv range*4)5.3%
MaxMP + X%(job adv range*4)5.3%
Weapon DEF + X%(job adv range*4)8.9%
Magic DEF + X%(job adv range*4)8.9%
HP Recovery Items and Skills + X%((job adv range+1)*10)8.9%
Ignore Damage %(10% chance, 20% damage)[Level 20+]8.9%
Ignore Damage %(10% chance, 40% damage)[Level 40+]8.9%
Able to use the <Decent Combat Orders> Skill[Level 70+]8.9%


Shields

Rare Secondary

StatFormula in relation to XProbability
STR + X(level/20)9.1%
DEX + X(level/20)9.1%
INT + X(level/20)9.1%
LUK + X(level/20)9.1%
MaxHP + X(level/2)9.1%
MaxMP + X(level/2)9.1%
Accuracy + X(level/5)9.1%
Avoidability +X(level/5)9.1%
Weapon DEF +X(level/2)13.6%
Magic DEF +X(level/2)13.6%


Rare Primary, Epic Secondary

StatFormula in relation to XProbability
STR + X(floor((level + 10)/20)*2)7.7%
DEX + X(floor((level + 10)/20)*2)7.7%
INT + X(floor((level + 10)/20)*2)7.7%
LUK + X(floor((level + 10)/20)*2)7.7%
MaxHP + X(level)7.7%
MaxMP + X(level)7.7%
Accuracy+ X(level/2.5)7.7%
Avoidability +X(level/2.5)7.7%
STR + X%(job adv range)1.2%
DEX + X%(job adv range)1.2%
INT + X%(job adv range)1.2%
LUK + X%(job adv range)1.2%
Accuracy + X%(job adv range)1.2%
Avoidability + X%(job adv range)1.2%
All Stat + X((level + 10)/20)1.9%
Weapon DEF + X(level)11.6%
Magic DEF +X(level)11.6%
MaxHP +X%(job adv range)1.2%
MaxMP +X%(job adv range)1.2%
Weapon DEF + X%(job adv range)1.9%
Magic DEF + X%(job adv range)1.9%


Epic Primary, Unique Secondary

StatFormula in relation to XProbability
sTR + X%(job adv range*2)5.9%
DEX + X%(job adv range*2)5.9%
INT + X%(job adv range*2)5.9%
LUK + X%(job adv range*2)5.9%
Accuracy + X%(job adv range*2)5.9%
Avoidability + X%(job adv range*2)5.9%
All Stat + X%(job adv range)3.9%
MaxHP + X%(job adv range*2)5.9%
MaxMP + X%(job adv range*2)5.9%
Weapon DEF + X%(job adv range*2)9.8%
Magic DEF + X%(job adv range*2)9.8%
Ignore Damage (20% chance, level/5 + 1)9.8%
Ignore Damage (20% chance, level*3/10 + 2)9.8%
Ignore Damage (30% chance, level*2/5 + 3)9.8%


Unique Primary, Legendary Secondary

StatFormula in relation to XProbability
STR + X%(job adv range*3)5.9%
DEX + X%(job adv range*3)5.9%
INT + X%(job adv range*3)5.9%
LUK + X%(job adv range*3)5.9%
Accuracy + X%(job adv range*3)5.9%
Avoidability + X%(job adv range*3)5.9%
All Stat + X%(job adv range*2)3.9%
MaxHP + X%(job adv range*3)5.9%
MaxMP + X%(job adv range*3)5.9%
Weapon DEF + X%(job adv range*3)9.8%
Magic DEF + X%(job adv range*3)9.8%
HP Recovery Items and Skills + X%(job adv range*10)9.8%
Ignore Damage %(5% chance, 20% damage)[Level 20+]9.8%
Ignore Damage %(5% chance, 40% damage)[Level 40+]9.8%


Legendary Primary

StatFormula in relation to XProbability
STR + X%(job adv range*4)5.9%
DEX + X%(job adv range*4)5.9%
INT + X%(job adv range*4)5.9%
LUK + X%(job adv range*4)5.9%
Accuracy + X%(job adv range*4)5.9%
Avoidability + X%(job adv range*4)5.9%
All Stat + X%(job adv range*3)3.9%
MaxHP + X%(job adv range*4)5.9%
MaxMP + X%(job adv range*4)5.9%
Weapon DEF + X%(job adv range*4)9.8%
Magic DEF + X%(job adv range*4)9.8%
HP Recovery Items and Skills + X%((job adv range+1)*10)9.8%
Ignore Damage %(10% chance, 20% damage)[Level 20+]9.8%
Ignore Damage %(10% chance, 40% damage)[Level 40+]9.8%


Accessory

Rare Secondary

StatFormula in relation to XProbability
STR + X(level/20)9.1%
DEX + X(level/20)9.1%
INT + X(level/20)9.1%
LUK + X(level/20)9.1%
MaxHP + X(level/2)9.1%
MaxMP + X(level/2)9.1%
Accuracy + X(level/5)9.1%
Avoidability +X(level/5)9.1%
Weapon DEF +X(level/2)13.6%
Magic DEF +X(level/2)13.6%


Rare Primary, Epic Secondary

StatFormula in relation to XProbability
STR + X(floor((level + 10)/20)*2)7.2%
DEX + X(floor((level + 10)/20)*2)7.2%
INT + X(floor((level + 10)/20)*2)7.2%
LUK + X(floor((level + 10)/20)*2)7.2%
MaxHP + X(level)7.2%
MaxMP + X(level)7.2%
Accuracy+ X(level/2.5)7.2%
Avoidability +X(level/2.5)7.2%
STR + X%(job adv range)1%
DEX + X%(job adv range)1%
INT + X%(job adv range)1%
LUK + X%(job adv range)1%
Accuracy + X%(job adv range)1%
Avoidability + X%(job adv range)1%
All Stat + X((level + 10)/20)1.8%
Weapon DEF + X(level)10.8%
Magic DEF +X(level)10.8%
MaxHP +X%(job adv range)1%
MaxMP +X%(job adv range)1%
Weapon DEF + X%(job adv range)1.8%
Magic DEF + X%(job adv range)1.8%
Every 4 seconds recover X HP(level/5)3.6%
Every 4 seconds recover X MP(level/5)3.6%


Epic Primary, Unique Secondary

StatFormula in relation to XProbability
sTR + X%(job adv range*2)8.3%
DEX + X%(job adv range*2)8.3%
INT + X%(job adv range*2)8.3%
LUK + X%(job adv range*2)8.3%
Accuracy + X%(job adv range*2)8.3%
Avoidability + X%(job adv range*2)8.3%
All Stat + X%(job adv range)5.6%
MaxHP + X%(job adv range*2)8.3%
MaxMP + X%(job adv range*2)8.3%
Weapon DEF + X%(job adv range*2)13.9%
Magic DEF + X%(job adv range*2)13.9%


Unique Primary, Legendary Secondary

StatFormula in relation to XProbability
STR + X%(job adv range*3)5.9%
DEX + X%(job adv range*3)5.9%
INT + X%(job adv range*3)5.9%
LUK + X%(job adv range*3)5.9%
Accuracy + X%(job adv range*3)5.9%
Avoidability + X%(job adv range*3)5.9%
All Stat + X%(job adv range*2)3.9%
MaxHP + X%(job adv range*3)5.9%
MaxMP + X%(job adv range*3)5.9%
Weapon DEF + X%(job adv range*3)9.8%
Magic DEF + X%(job adv range*3)9.8%
HP Recovery Items and Skills + X%(job adv range*10)9.8%
Ignore Damage %(5% chance, 20% damage)[Level 20+]9.8%
Ignore Damage %(5% chance, 40% damage)[Level 40+]9.8%


Legendary Primary

StatFormula in relation to XProbability
STR + X%(job adv range*4)4.9%
DEX + X%(job adv range*4)4.9%
INT + X%(job adv range*4)4.9%
LUK + X%(job adv range*4)4.9%
Accuracy + X%(job adv range*4)4.9%
Avoidability + X%(job adv range*4)4.9%
All Stat + X%(job adv range*3)3.2%
MaxHP + X%(job adv range*4)4.9%
MaxMP + X%(job adv range*4)4.9%
Weapon DEF + X%(job adv range*4)8.2%
Magic DEF + X%(job adv range*4)8.2%
HP Recovery Items and Skills + X%((job adv range+1)*10)8.2%
Reduce MP Consumption: - X%ceiling(level/50)*58.2%
MP Consumption: -X%ceiling(level/50)*108.2%
Meso Droprate: +X%(job adv range + 1)*58.2%
Item Droprate: +X%(job adv range + 1)*58.2%


Weapons

Rare Secondary

StatFormula in relation to XProbability
STR + X(level/20)10.5%
DEX + X(level/20)10.5%
INT + X(level/20)10.5%
LUK + X(level/20)10.5%
MaxHP + X(level/2)10.5%
MaxMP + X(level/2)10.5%
Accuracy + X(level/5)10.5%
Avoidability +X(level/5)10.5%
Weapon Attack +X(level/20)7.9%
Magic Attack +X(level/20)7.9%


Rare Primary, Epic Secondary


Epic Primary, Unique Secondary

StatFormula in relation to XProbability
sTR + X%(job adv range*2)5.5%
DEX + X%(job adv range*2)5.5%
INT + X%(job adv range*2)5.5%
LUK + X%(job adv range*2)5.5%
Accuracy + X%(job adv range*2)5.5%
Avoidability + X%(job adv range*2)5.5%
All Stat + X%(job adv range)3.6%
Weapon Attack + X%(job adv range*2)5.5%
Magic Attack + X%(job adv range*2)5.5%
Critical Rate + 8%-5.5%
Total Damage + X%(job adv range*2)5.5%
Recover X HP when attacking(3% chance, level*3/10 + 17 HP)18.2%
Recover X MP when attacking(3% chance, level*3/10 + 17 MP)18.2%
Ignore 15% of Enemy DEF[Level 30+]5.5%


Unique Primary, Legendary Secondary

StatFormula in relation to XProbability
STR + X%(job adv range*3)7.7%
DEX + X%(job adv range*3)7.7%
INT + X%(job adv range*3)7.7%
LUK + X%(job adv range*3)7.7%
Accuracy + X%(job adv range*3)7.7%
Avoidability + X%(job adv range*3)7.7%
All Stat + X%(job adv range*2)5.1%
Weapon Attack + X%(job adv range*3)7.7%
Magic Attack + X%(job adv range*3)7.7%
Critical Rate + X%(job adv range*3)7.7%
Total Damage + X%(job adv range*3)7.7%
Ignore 30% of Enemy DEF[Level 50+]7.7%
When attacking bosses, damage +20%[Level 50+]5.1%
When attacking bosses, damage +30%[Level 50+]5.1%


Legendary Primary

StatFormula in relation to XProbability
STR + X%(job adv range*4)6.8%
DEX + X%(job adv range*4)6.8%
INT + X%(job adv range*4)6.8%
LUK + X%(job adv range*4)6.8%
Accuracy + X%(job adv range*4)6.8%
Avoidability + X%(job adv range*4)6.8%
All Stat + X%(job adv range*3)4.5%
Weapon Attack + X%(job adv range*4)6.8%
Magic Attack + X%(job adv range*4)6.8%
Critical Rate + X%(job adv range*4)6.8%
Total Damage + X%(job adv range*4)6.8%
Ignore 35% of Enemy DEF[Level 50+]6.8%
Ignore 40% of Enemy DEF[Level 100+]6.8%
When attacking bosses, damage +30%[Level 50+]4.5%
When attacking bosses, damage +35%[Level 100+]4.5%
When attacking bosses, damage +40%[Level 100+]4.5%


Key
WordMeaning
job adv rangeLevel 0-30: 1, 31-70: 2, 71+: 3
level The level of the item
floor(x)Rounding down the value.
ceiling(x)Rounding up the value.
[Level X]Level required to get the potential.

Credits
This thread and the two simulators that were deleted.
Cynthia, who has left me.
Fiel, for reference to form formulas
This and the many other Insoya threads used as a reference
Me for spending 2 days formatting this dumb thread.
Kaasoljoyyx for telling me to post this indirectly.

Sognare - MapleSEA Monster Life Building Placement

$
0
0

Building NameLevelAmount it can storeSize(List is not comprehensive, unimportant buildings have been omitted)


Ariant Hut153604


Guard Post167009


Elluel Hut184004


Santa's House214504


Rien Igloo246004


Arms Shop2512009


Jack House269904


Edel Airfield 2718009


LevelNumber of monstersNumber of tiles that can be used


1 - 22333


33332


44331


55330


6 - 76329


8 - 97328


10 - 118327


12 - 149326


15-1710325


18-2011324


21-2312323


24-2513322


26-2714321


28-2915320


30-3216319


33-3617318


37-4018317


How to optimize:
Code: Black - Unmovable 5x5 buildingYellow: 2x2 Blue: 3x3Green: Unused space (Fill up excess slots with decorations as much as possible)


Levels 1-15


Level 16-17 (Appearance of first 3x3 building)Assuming that this is the most efficient method, this will hold true until level 23Total number of usable tiles: 325
Our 3x3 building takes 9 spaces, for 700 storage. Our 2x2 building takes 4 spaces, for 360 storage. 2 2x2 buildings = 720 storage in exchange for 8 spaces.The optimal 2x2 building placement is trivial, and shown above. It leaves a total of 28 unused spaces. In order to optimize, we have to change some of the 2x2 buildings to 3x3 such that we get more than 720/700 per space that we utilize. Out of these 28 spaces, we can use up to 17 of them.
1. 76 2x2, 2 3x3 (28760 storage) 2. 74 2x2, 3 3x3 (28740 storage). 3. 72 2x2, 4 3x3 (28720 storage). 4. 70 2x2, 5 3x3 (28700 storage). Any further calculations are unnecessary, due to the number of tiles, and the 2x2 building being more efficient. I have been unable to think of a way to manage it with 76 2x2 and 2 3x3 buildings. If you are able to, please help. For now, I assume that mine is absolutely optimal, since I managed 74 2x2 and 3 3x3 buildings.


Level 27-29: (Or just remove a 2x2 from above)


So, this is ZEN's hyper skill..

Monster Life - The art of building placement. Warus only, no gems.

$
0
0
Done with waru-only buildings, as well as a 19x19 farm.

To me, the most important thing is how much they can store, as I am not able to login every 5 hours to collect.

It is still a work in progress, but
https://docs.google....dmc&usp=sharing

If anyone wants to help, please, leave a comment.

I just nerded this game really hard >.>

Cygnus Returns hits MapleSEA 7th August 2013!

$
0
0
Cygnus Returns hits MapleSEA 7th August 2013!!!

• [Revamp] Striker
- 2nd Job: http://youtu.be/JbPwLFHWZ_I
- 3rd Job: http://youtu.be/szHafb-UWkw
- 4th Job: http://youtu.be/lPnxe4SH-1E
- Hyper: http://youtu.be/lXWYpkVLn7w

• [Revamp] Wind Breaker
- 1st Job: http://youtu.be/0wuB0A5GOv0
- 2nd Job: http://youtu.be/gFC4QAhcZqQ
- 3rd Job: http://youtu.be/Q6dDxAwSB9o
- 4th Job + Hyper: http://youtu.be/DCIDE8vVkbo

• [Revamp] Soul Master
- 1st Job: http://youtu.be/r63OQfIGd00
- 2nd Job: http://youtu.be/Sl8DxICrof8
- 3rd Job: http://youtu.be/6XxiBcQJ_l8
- 4th Job: http://youtu.be/yYy67d4pbcs
- Hyper: http://youtu.be/kj8n2-od7ac

• [System] Level Capacity Increase: Level 250
• [System] Maximum Mesos Capacity Increase: 9,999,999,999
• [Map] Twilight of Perion: http://youtu.be/gIEzUTBQXOI
• [Map] Faded Citadel: http://youtu.be/EbUHeIfvb84
• [Map] Colossus: http://youtu.be/WvZ8WMytzrw
• [System] Soul Weapon: http://youtu.be/tUA9xeVkH7I

• [Map] Root Abyss? (UNCONFIRMED)
- Animated Trailer: http://youtu.be/6t8CNEM2EE0
- Crimson Queen Boss: http://youtu.be/Z17-SMMdYm4
- Von Bon Boss: http://youtu.be/Q4xNJel_aW0
- Pierre Boss: http://youtu.be/6hmFu8PsWSE
- Vellum Boss: http://youtu.be/Pyc7iieey1U


Resized to 67% (was 898 x 933) - Click image to enlargePosted Image


Full credits to x3TheAran59

MapleSEA Cygnus Returns i-Gacha

$
0
0
Dear Maplers,

Posted Image


Cygnus Returns i-Gacha is here! Introducing highly sought after chair like Pink Bean Chair, Shinsoo Chair as well as all NEW Squeep chair.

i-Gacha will only be around from 29th July to the 11th August 2013,0900hrs(GMT+8).

Time: 24hrs Daily

i-Gacha Event Duration: 29th July 2013, 1300hrs to the 11th August 2013,0900hrs


Reward Lists

Posted Image


1. 3 Equip Enhancement Scrolls Coupon
2. 3 Advanced Potential Scrolls Coupon
3. 50% up EXP Coupon (3Hour)
4. Resurrection Flame Level 110
5. Resurrection Flame Level 120
6. Resurrection Flame Level 130
7. 2 Advanced Equip Enhancement Scrolls Coupon
8. Von Leon Chair
9. Tuxedo Kitty Chair
10. Divine Bird (365 Days) *HOT
11. Squeep *HOT
12. Pink Bean Chair *HOT
13. Chaos Scroll 60% *HOT
14. Dark Angelic Blessing Recipe *HOT
15. Resurrection Flame Level 140 *HOT
16. 3 Star Enhancement Scroll *HOT
17. 4 Star Enhancement Scroll *HOT
18. White Angelic Blessing Recipe *HOT
19. Endless Heart of Aria *HOT
20. Miracle Scroll for Bow for ATT *HOT
21. Miracle Scroll for Knuckle for ATT *HOT
22. Miracle Scroll for One-Handed Sword for ATT *HOT
23. Miracle Scroll for Two-handed Sword for ATT *HOT

Hekaton, the World Boss

$
0
0
http://orangemushroo...t-boss-hekaton/

"The new boss Hekaton which I mentioned a couple of posts ago has finally been released to fight in this minor patch. Hekaton is a giant boss which can have up to 100 Maplers fighting against him, from any world!"

expect world to world trades anyone?
Viewing all 853 articles
Browse latest View live